Headings and Navigation
When working in a R markdown document (R markdown or R notebook) there are a number of ways to change the appearance of text within these non-coding regions.
The easiest way to make your code more readable and navigable is to place some headings before different sections of your code. This is simply done by placing a # (hashtag) before your heading on its own line. e.g. # Heading. Because this is not on its own line, it will not default to a heading.
# One Hashtag
## Two Hashtags
### Three Hashtags
#### Four Hashtags
##### Five Hashtags
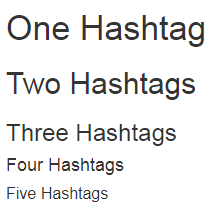
Once knitted (**and outside a code chunk), these will appear in a large font text like so:

Even without these knitted into another document format, these are still useful in your document.
Navigating your code
These will not only help in dividing up your document, but will assist in navigating it. Navigating code can be painful at the best of times but when there are hundreds (or even thousands) of lines of code, it’s pure hell. The navigation tools in R studio are very useful when this happens.

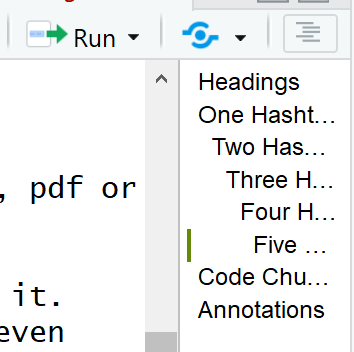
Clicking this navigation button (where is says Headings) will bring up a list of all the # headings you have throughout your document, along with all the code chunks. The second method of navigating is by using the document outline window located at the edge of your window near the run button.

The document outline button is the one that looks like a list (next to the “pokeball” button). As you can see, this will list all your headings in the document, but wont list any of you coding chunks.
Which brings us to the next helpful tip.